← All guides · Your items
Photograph and identify an item
Add a new item from photos — Stashery works out what it is, fills in the details and gives it a stash number.
Updated
What you'll end up with
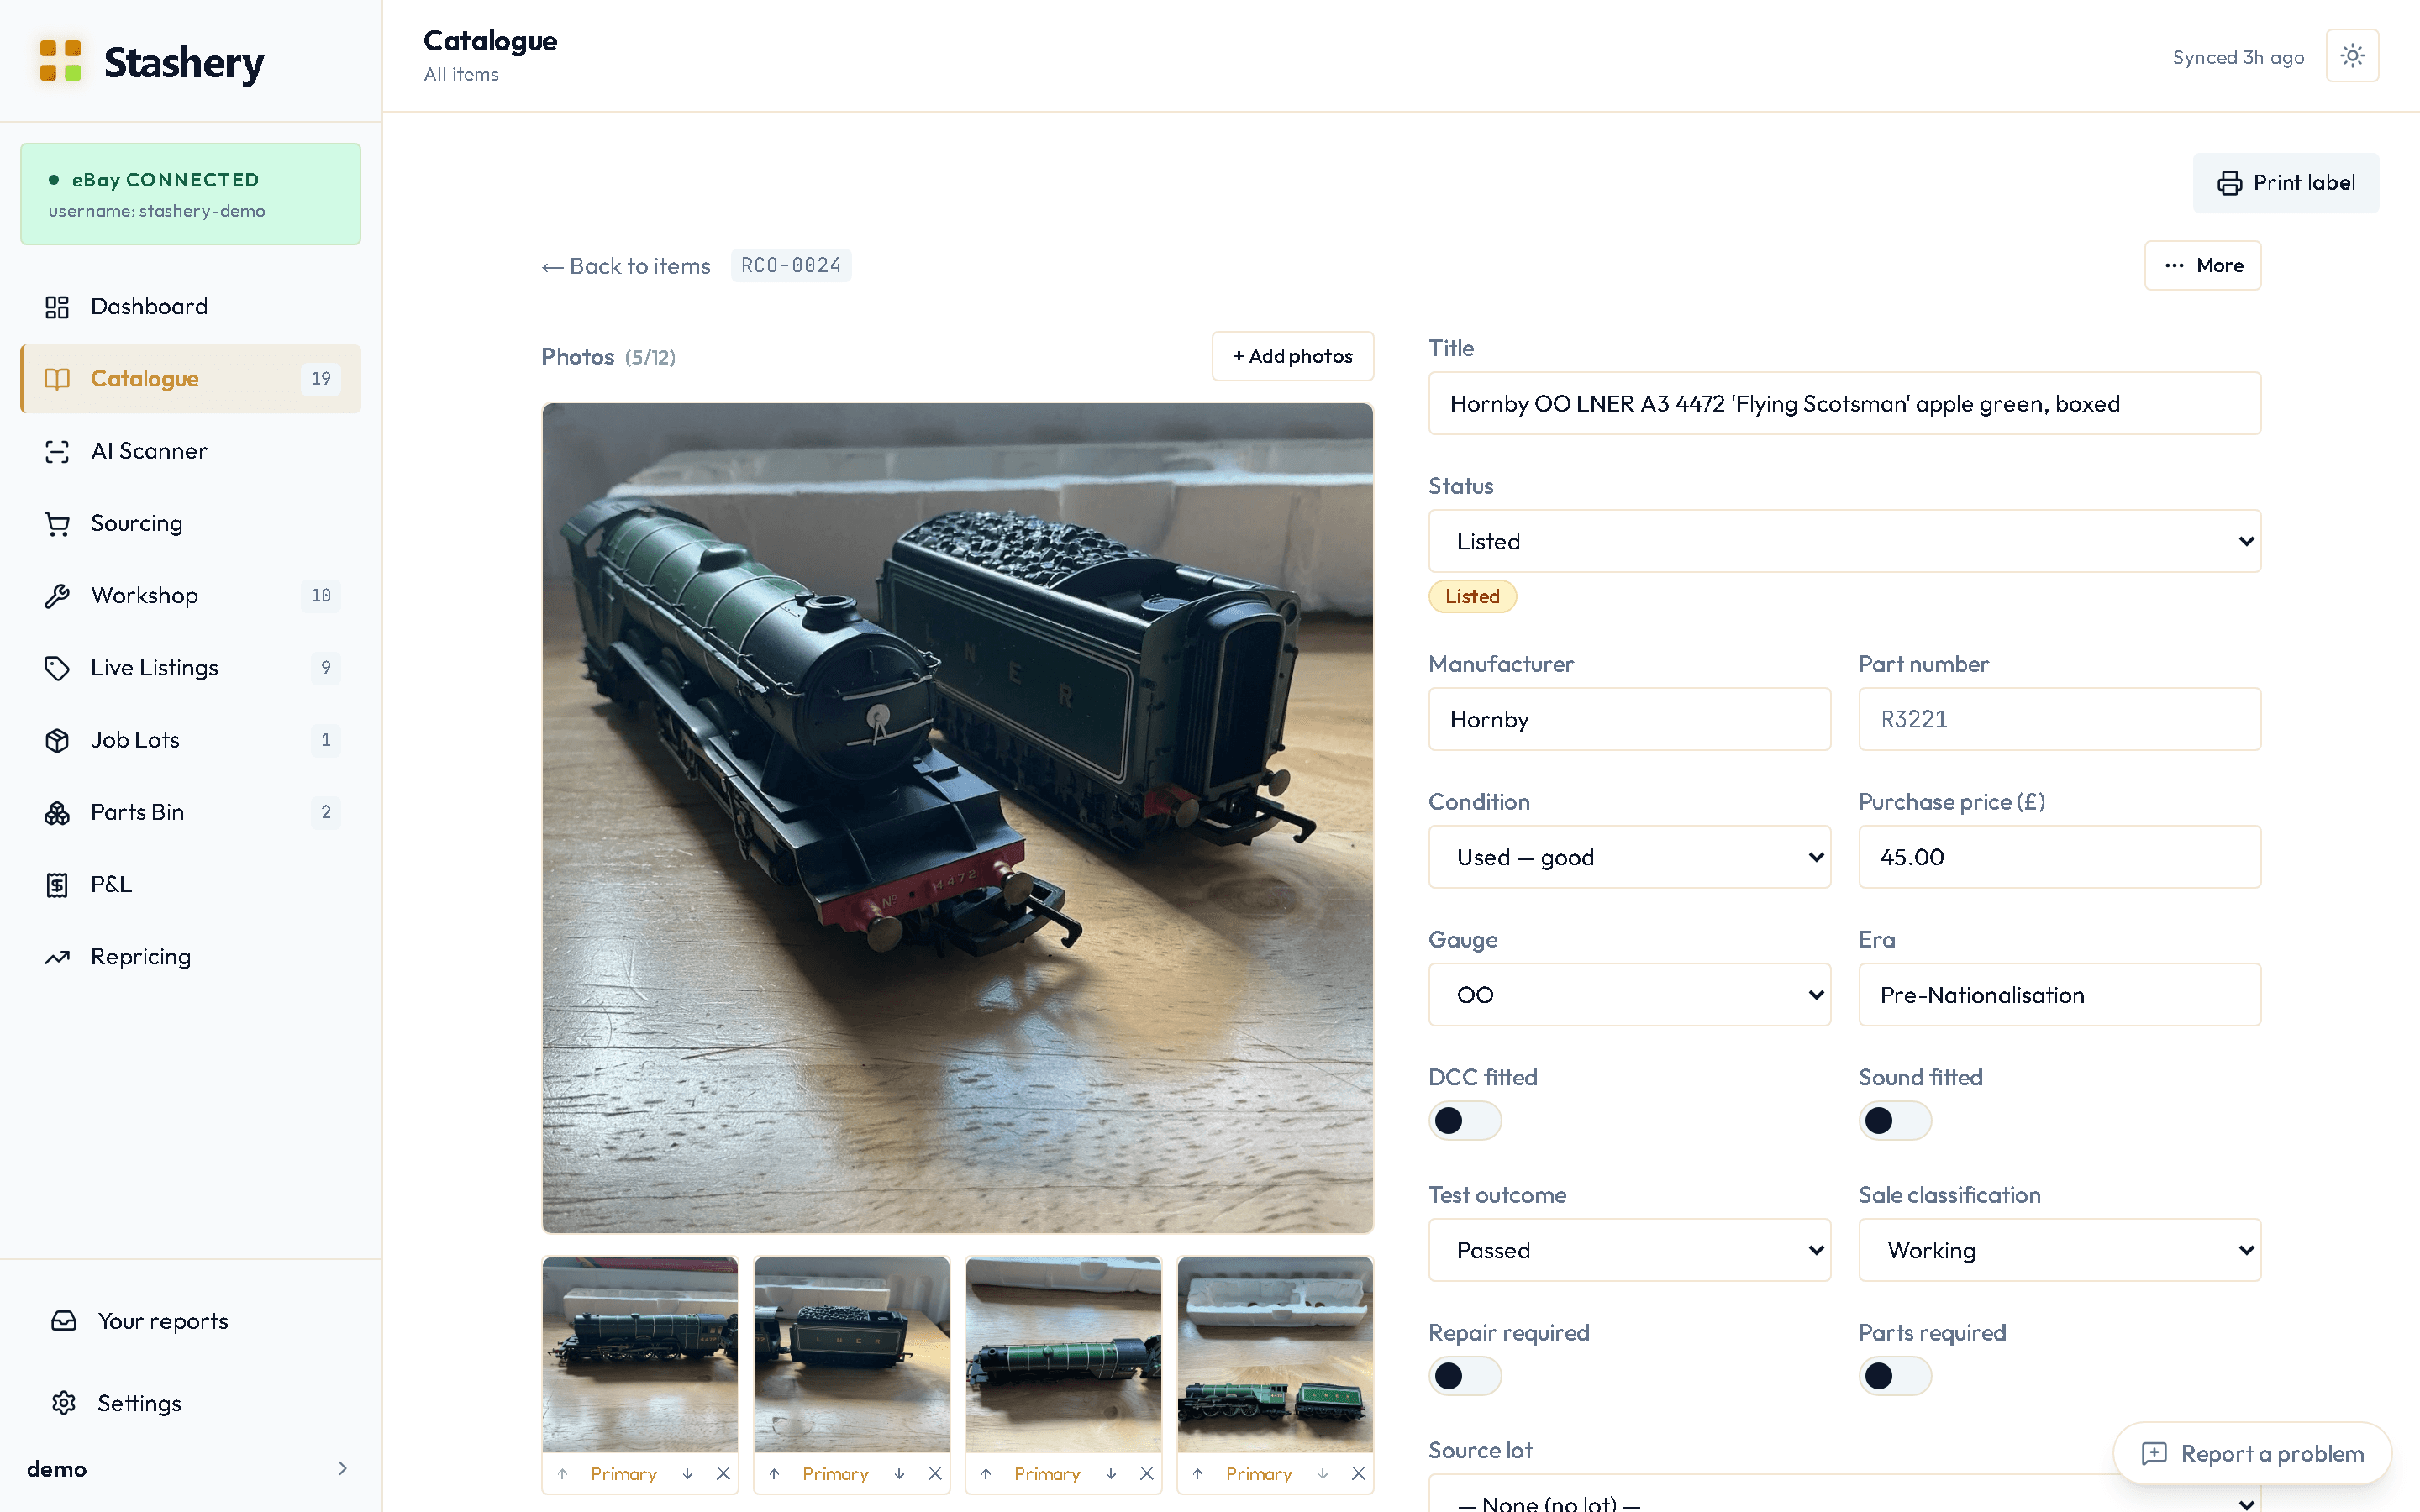
A new item in your Catalogue with the manufacturer, class, catalogue number, gauge, era and condition filled in, a plain-English description in the notes, the photos attached, and a stash number (RCO-0091, say) you can write on the box or print as a label. The item lands in the Workshop's In Test column, ready to be checked before it's listed.
Steps
- Press Add item (the + on the Dashboard, or Catalogue → Add).
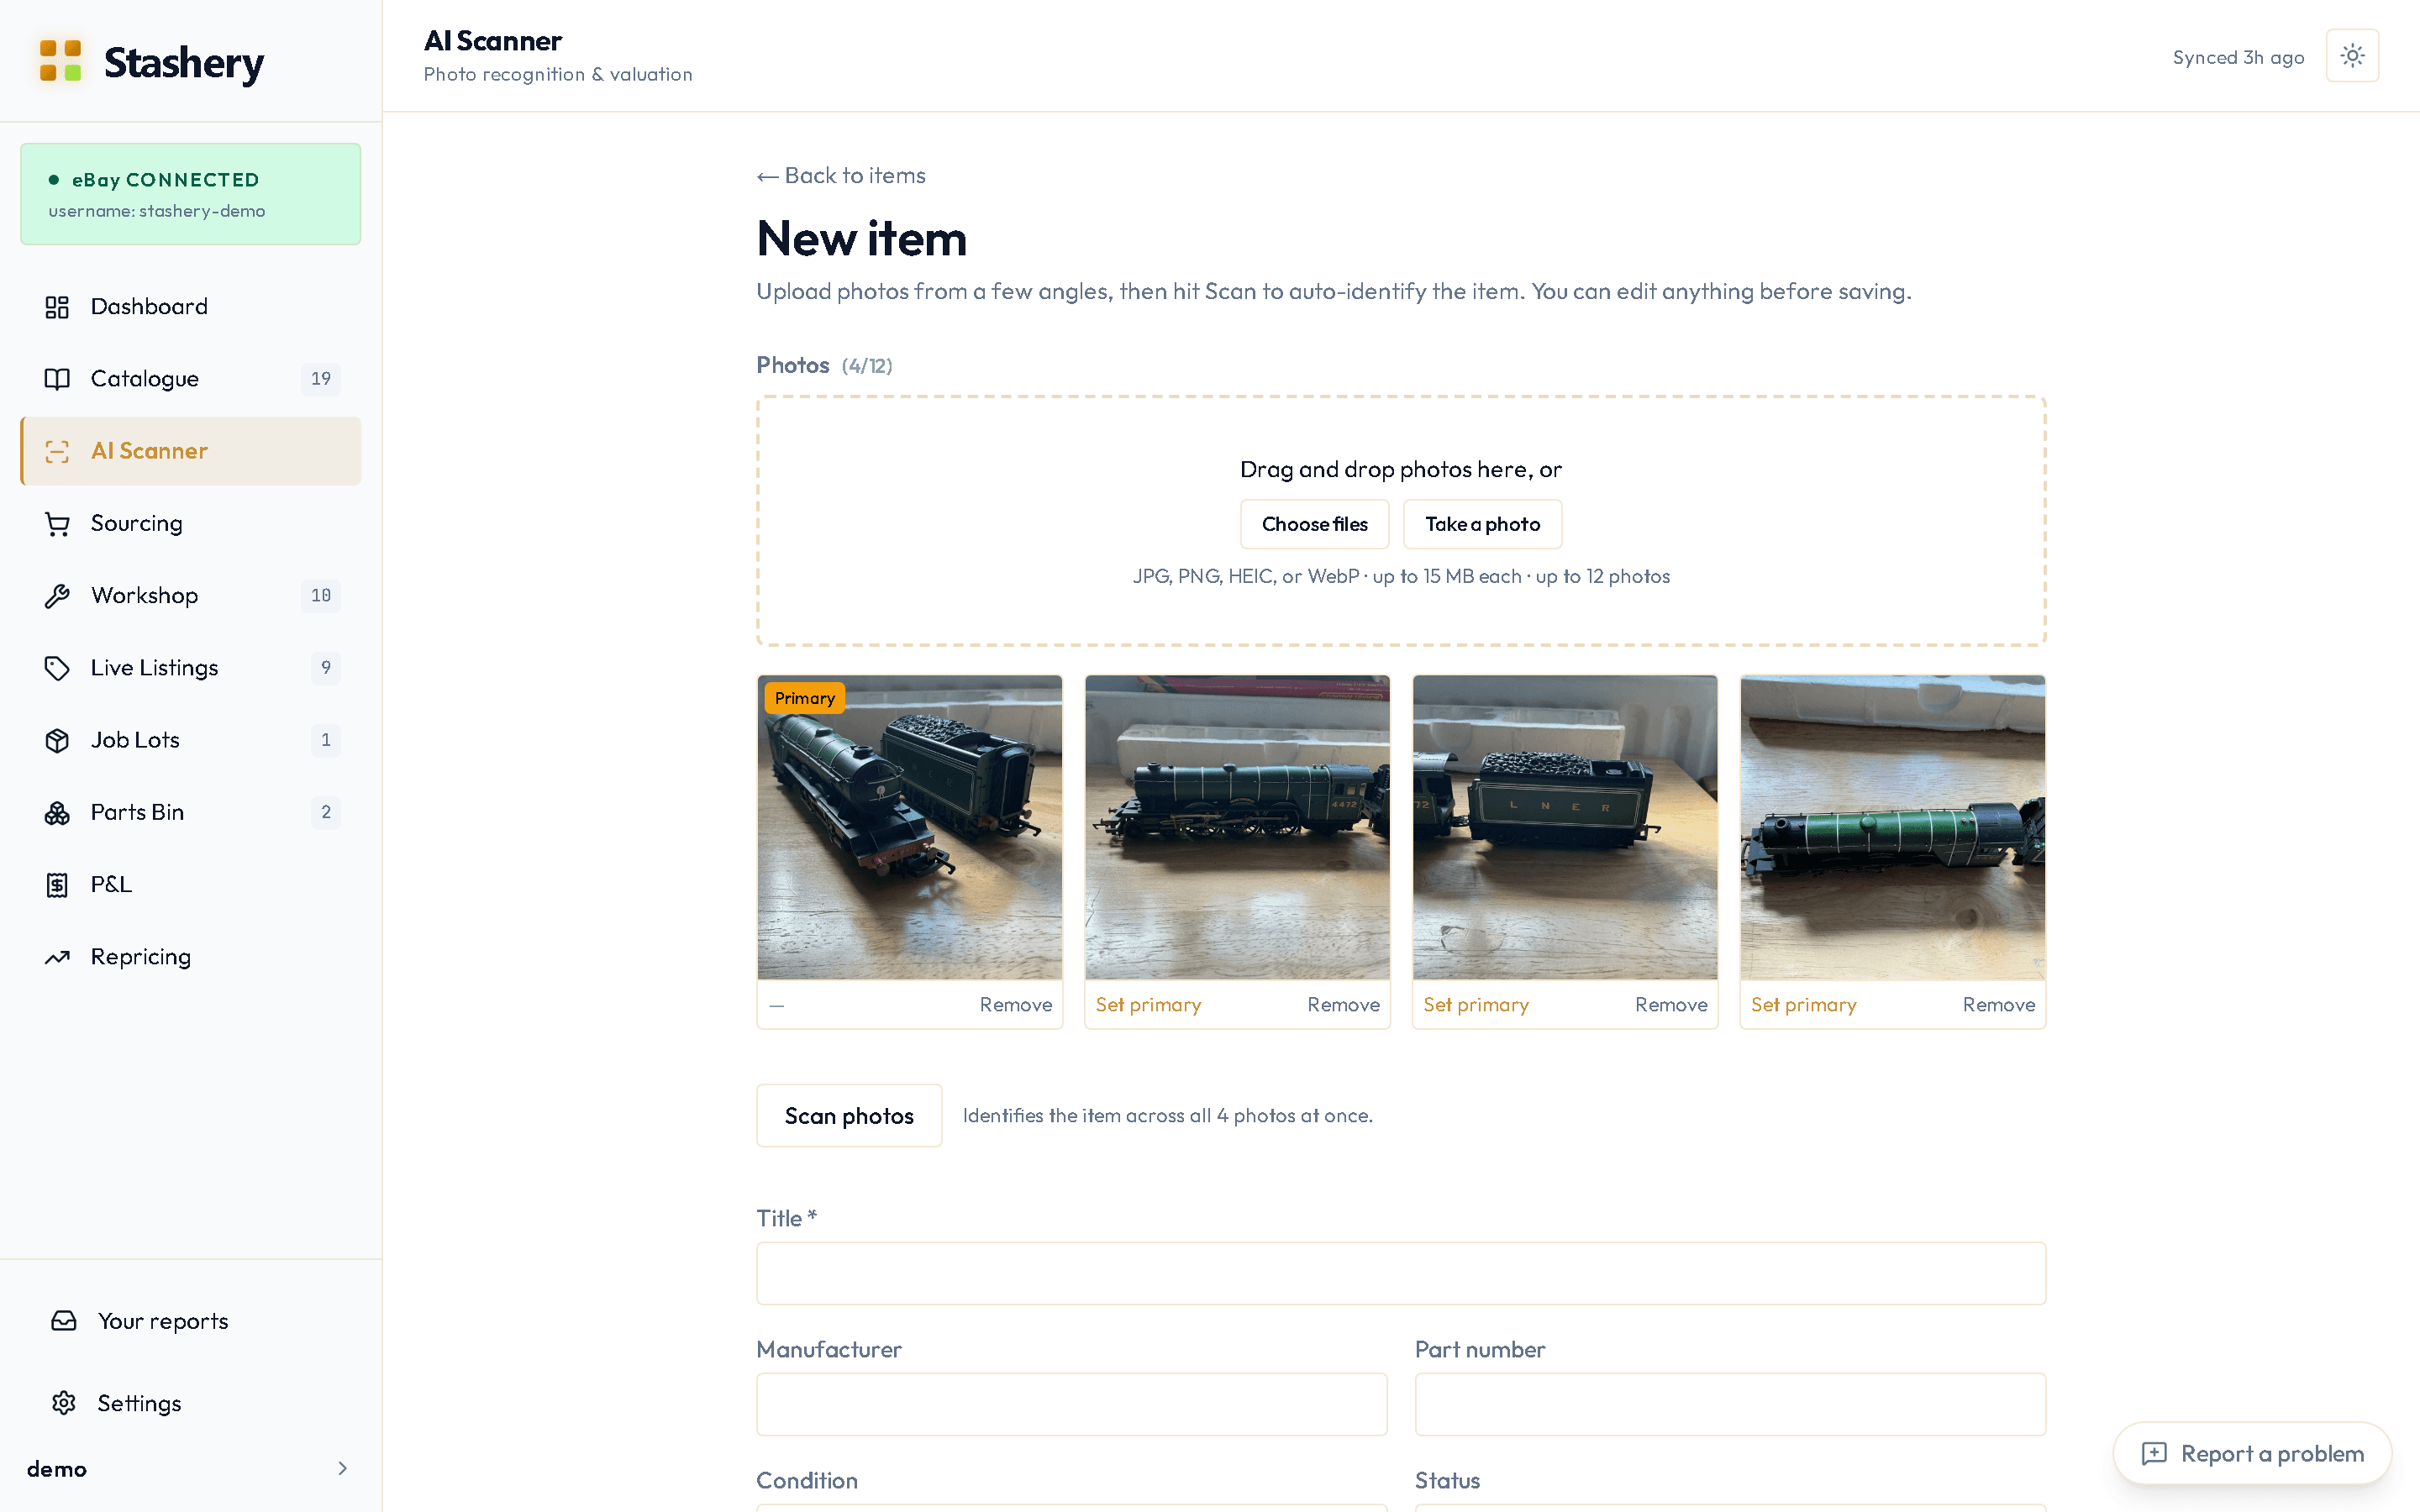
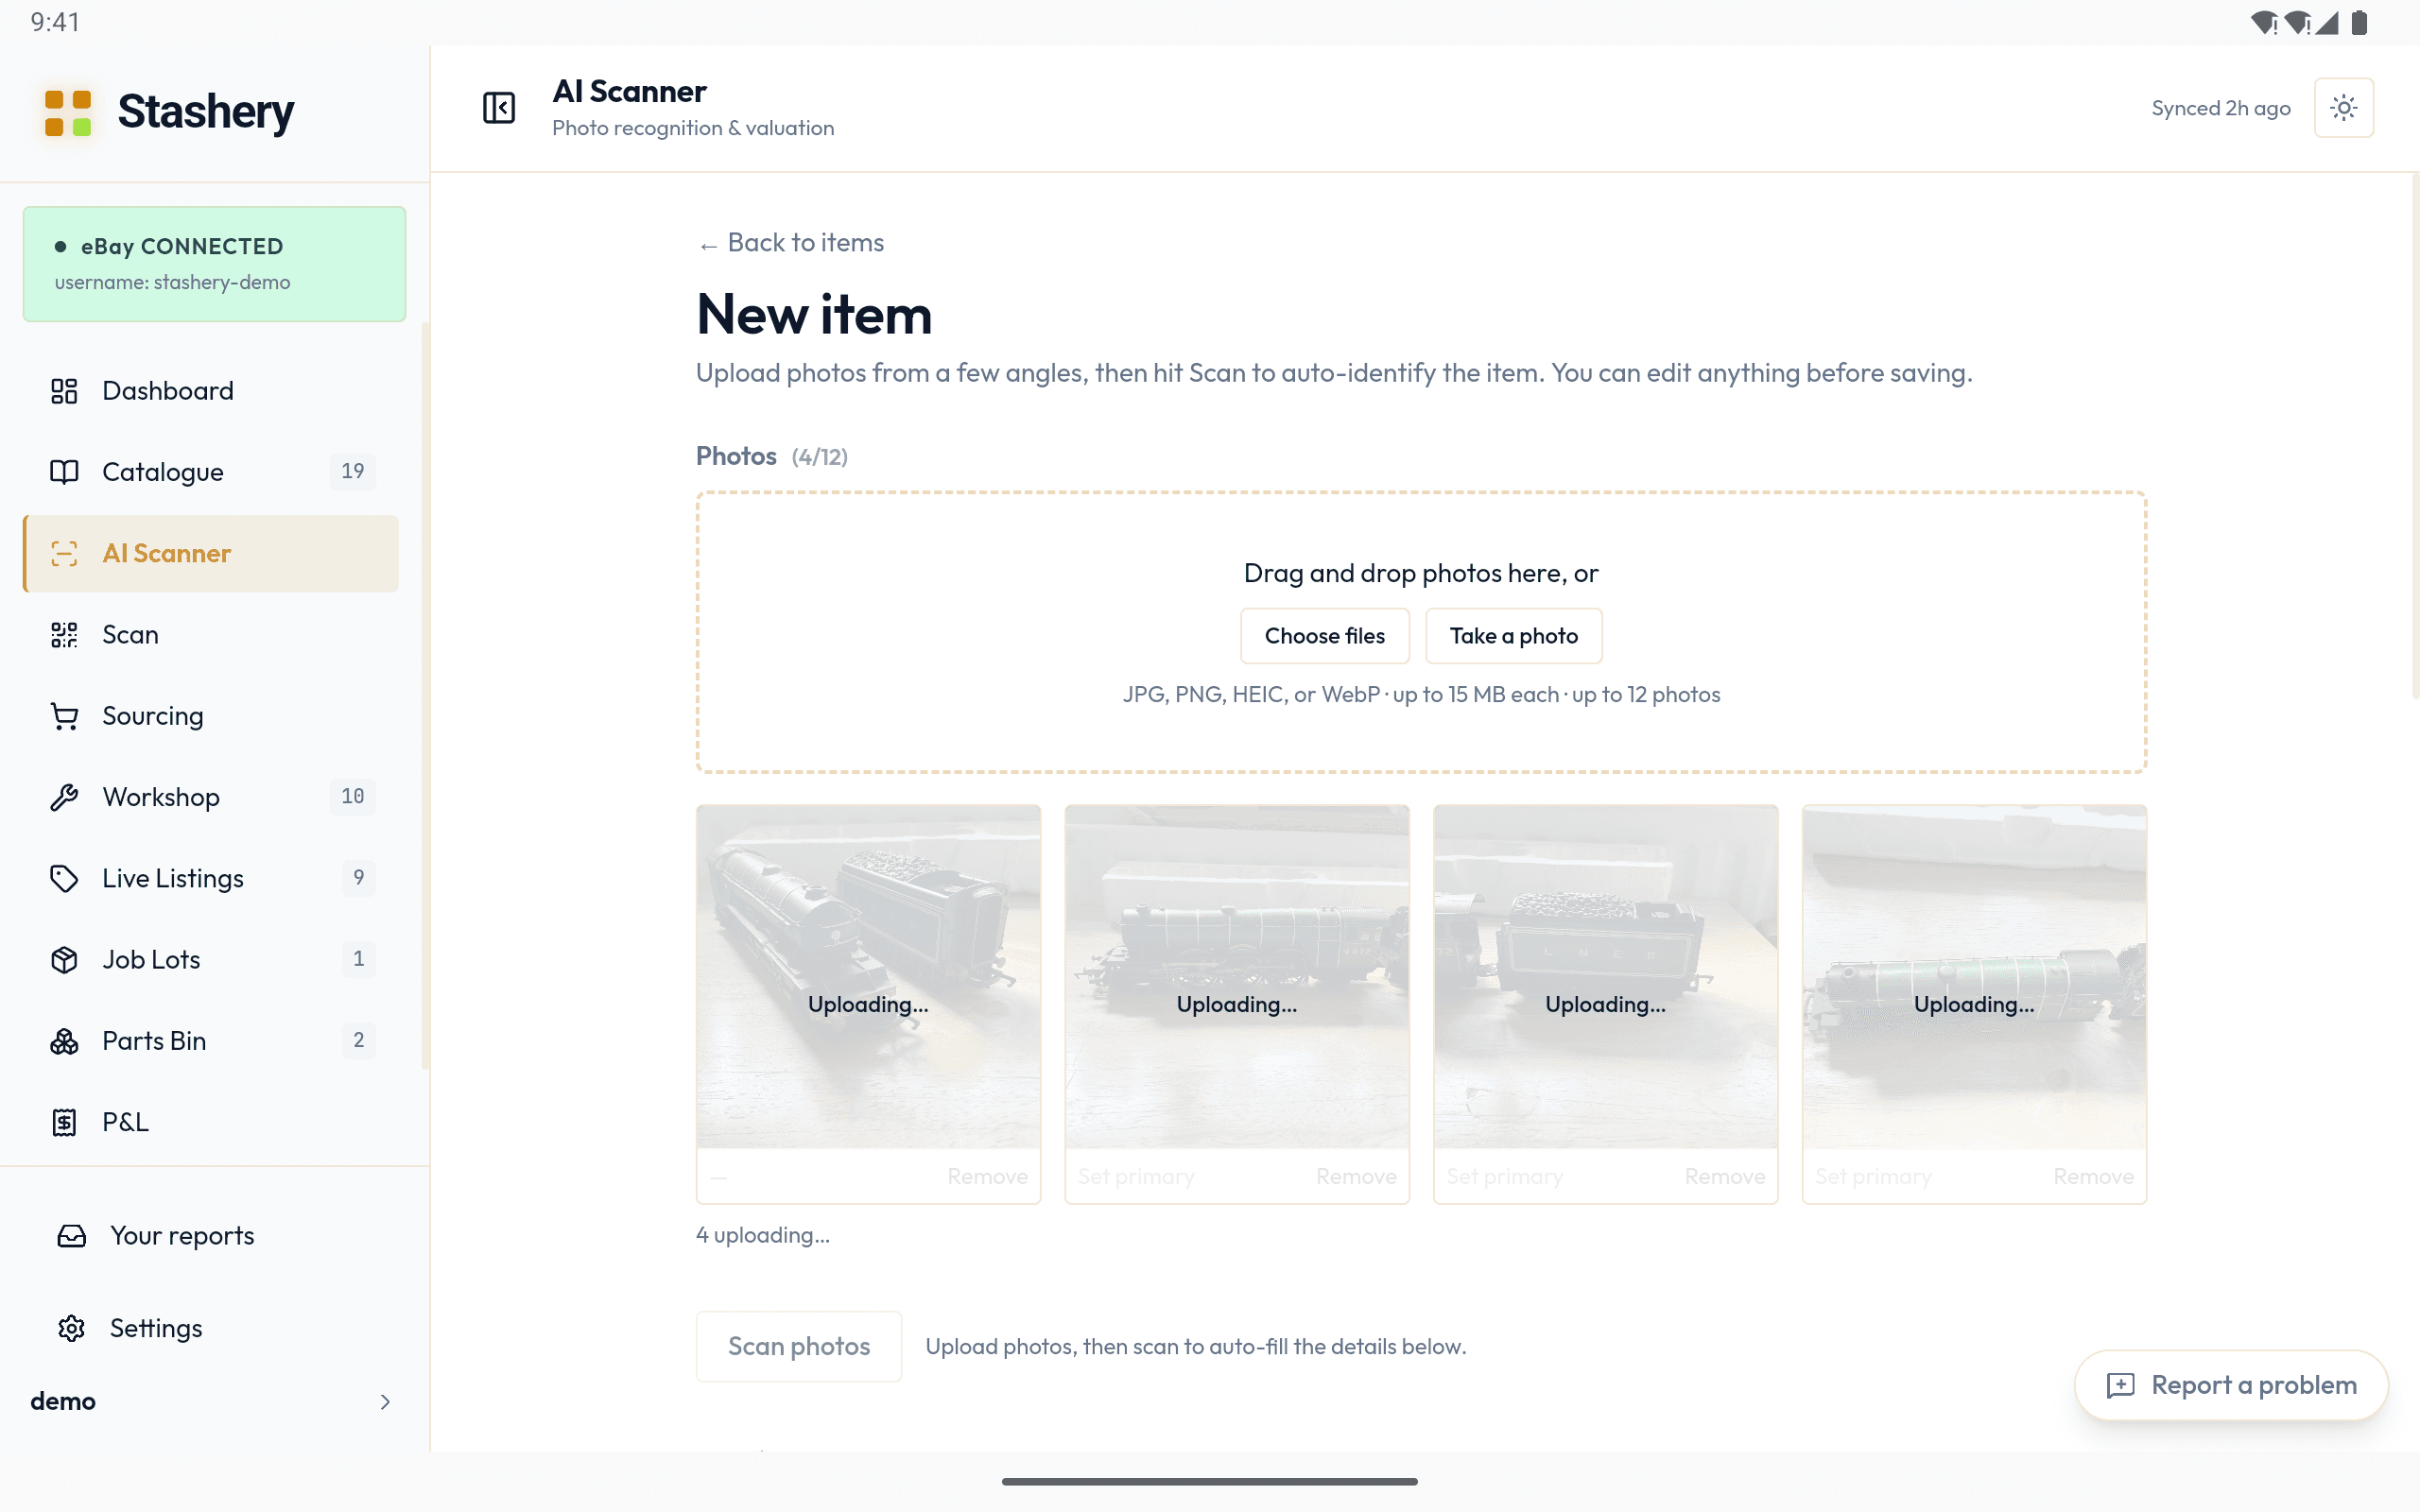
- Add photos. On the website, drag them in or choose files; on the app, press the camera and take them there and then. Three or four angles help most: the loco or wagon side-on, the underside (that's where the running number and maker's marks are), the box end if you have it, and any damage.
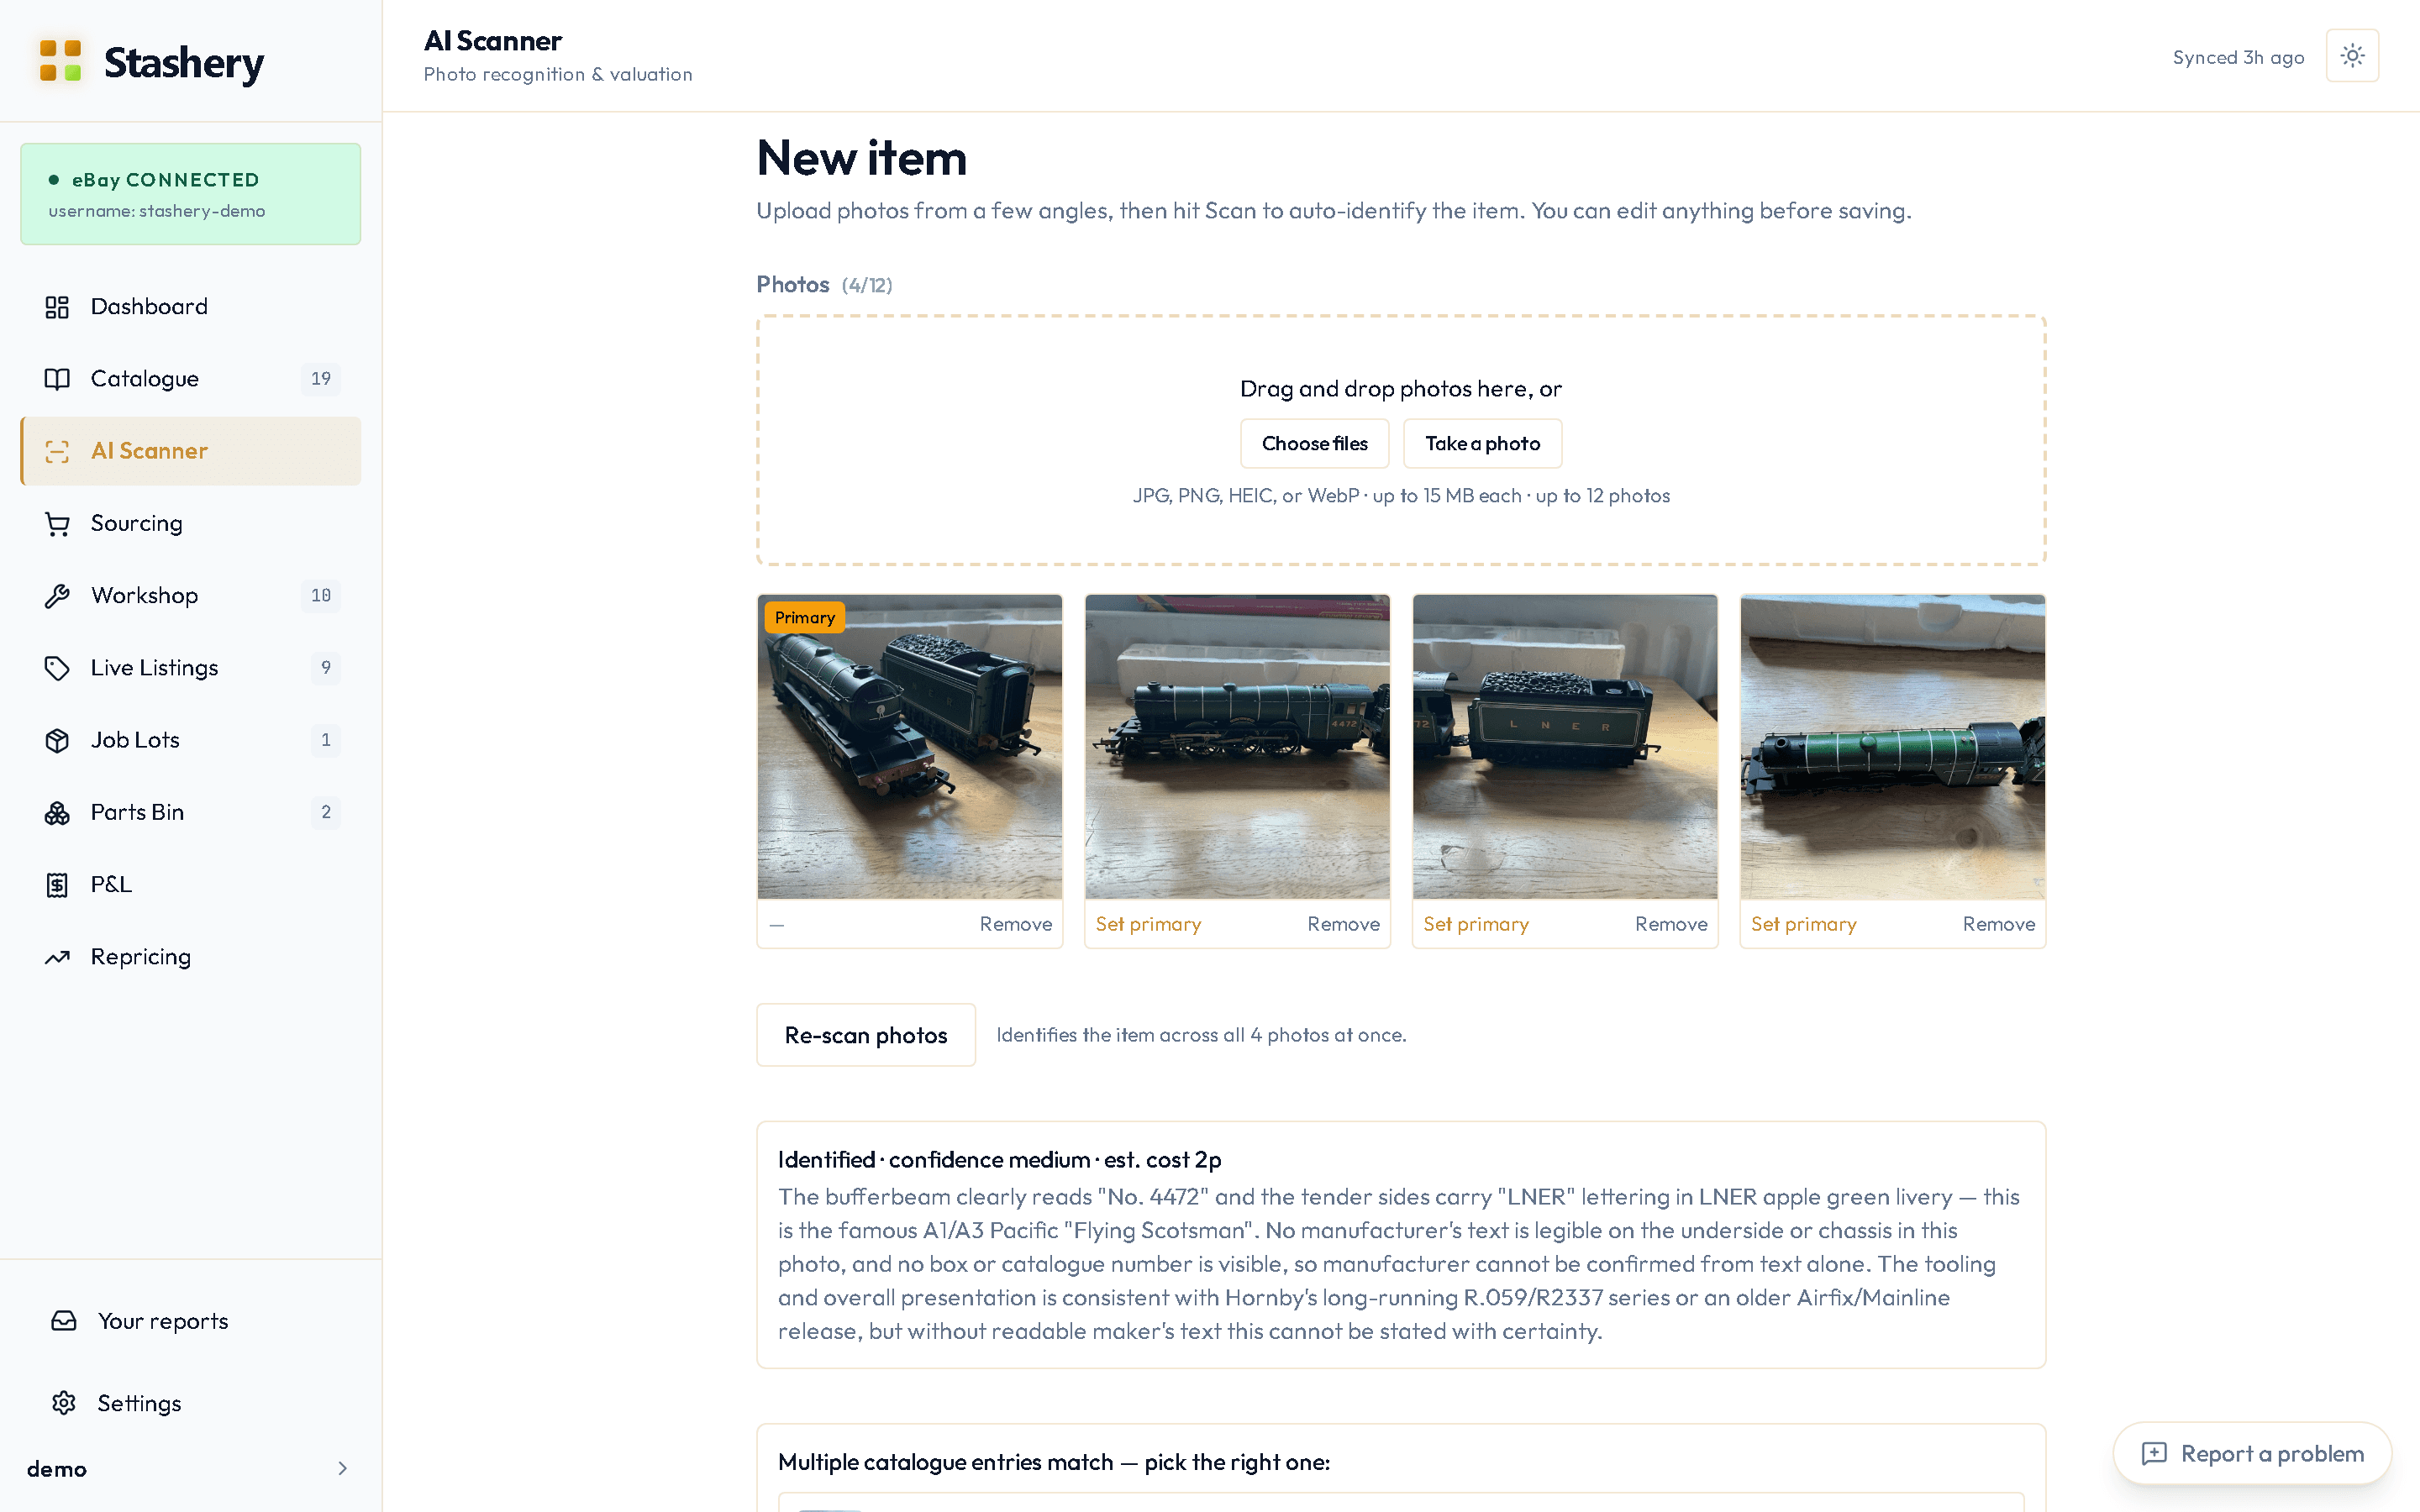
- Press Scan. Stashery looks at all the photos together and fills in the form: title, manufacturer, catalogue number, gauge, era, condition, type, and a description in the notes.
- Read what it filled in. The catalogue number is the one to check — it drives the pricing later. If Stashery wasn't sure it leaves the box empty rather than guessing, and offers candidates you can pick from.
- Add what only you know: the purchase price, and any intake flags — needs repair, sell as spares, parts only.
- Press Save. You'll see the new stash number at the top of the item.
What you'll see
The item page shows the photos, the details, and a Sold-price comps panel that starts working as soon as there's a manufacturer and catalogue number (see Price an item). In the Workshop, the item appears under In Test.
If something goes wrong
Scan filled in the wrong model. Correct the fields by hand, or press Re-identify on the item page — it uses the title and anything you've typed to propose candidates with a reason for each, and you choose which to apply.
The photo won't upload from my phone. Photos are compressed on the phone before uploading, so even large ones should go through. If one refuses, take it again in the app rather than picking from the gallery — that fixes it nearly every time.
It's a job lot, not one item. Use Job Lots → New job lot instead. Photograph the whole lot, press Scan, and you get an editable list of everything it found; you decide which become individual items and how the cost is split between them.
The scan came back with nothing. Usually the photos are too dark or too far away. Get closer, get the underside in daylight, and try again.